
Last Updated: October 26, 2026
Quick Summary
To match drywall texture, identify your existing texture type (orange peel, knockdown, or popcorn), spray a test patch on cardboard to match bump size and density, then feather the repair 6 to 12 inches onto surrounding wall in light passes and inspect under raking light before painting.
- Orange peel is the most common and forgiving residential texture; knockdown requires precise peak alignment and is harder to match.
- A hopper gun works for patches larger than a few square feet; aerosol cans are best for repairs under roughly 1 square foot.
- Mix texture to pancake-batter consistency: pourable but thick enough to hold bumps without sagging or clogging the applicator.
- Feather texture beyond the patch with overlapping light passes rather than one heavy coat to create a gradual transition.
- Always inspect the blend under raking light before painting; paint amplifies texture mismatches rather than hiding them.
Table of Contents
- Why Matching Drywall Texture Matters
- Identifying Common Drywall Texture Types
- Essential Drywall Texture Tools and Materials
- Preparing Your Surface Before Matching Texture
- How to Blend a Drywall Patch Seamlessly
- Applying Texture to Match Orange Peel Finishes
- Applying Texture to Match Knockdown Finishes
- Drying, Sanding, and Painting for a Flawless Finish
- Frequently Asked Questions
Why Matching Drywall Texture Matters
When you patch drywall, the real work is learning how to match drywall texture and make the patch disappear.
At HandyFixNow, we know most homeowners underestimate this step: they patch, sand, paint, and only then notice the glaring texture mismatch.
This guide walks you through how to match drywall texture like a professional, whether your wall has orange peel, knockdown, or popcorn texture.
Identifying Common Drywall Texture Types
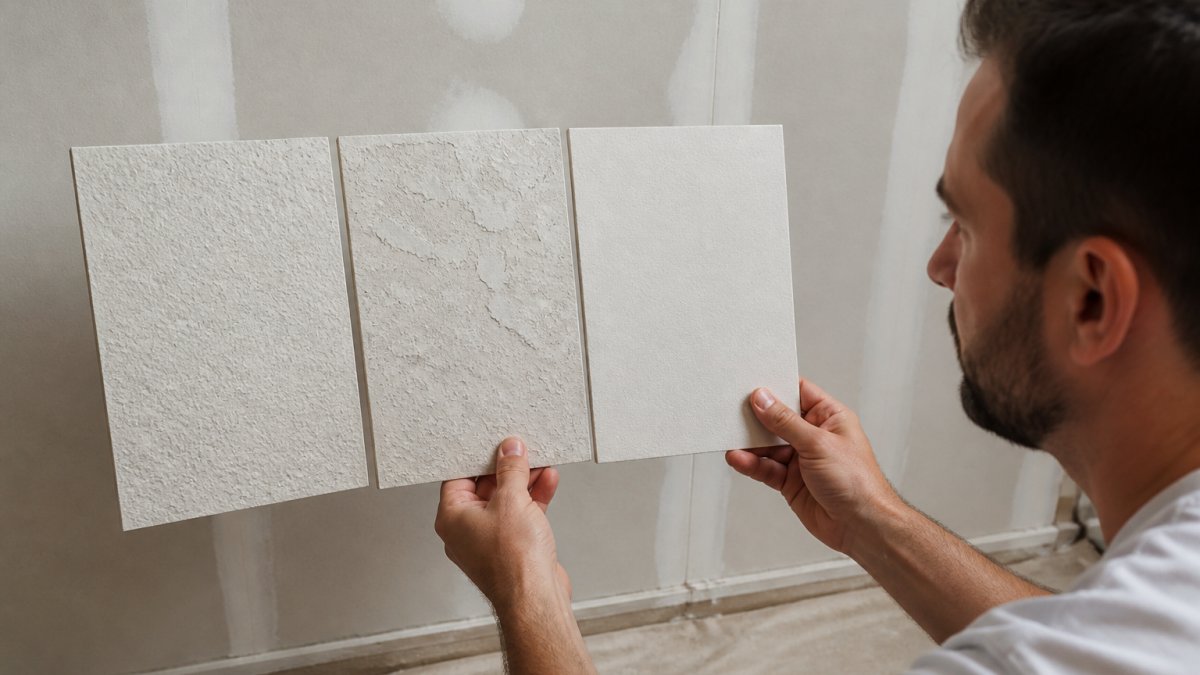
First, figure out what texture you’re working with. Each type requires a different application method and material ratio; get this wrong and your patch will never blend.
Orange Peel Texture
Orange peel is the most common residential texture: a fine, uniform pattern resembling orange skin that looks bumpy but feels smooth. Run your hand across it and it won’t snag; hold a light at an angle and you’ll see a consistent bumpy pattern. It’s forgiving because slight variations blend in easily.
Knockdown Texture
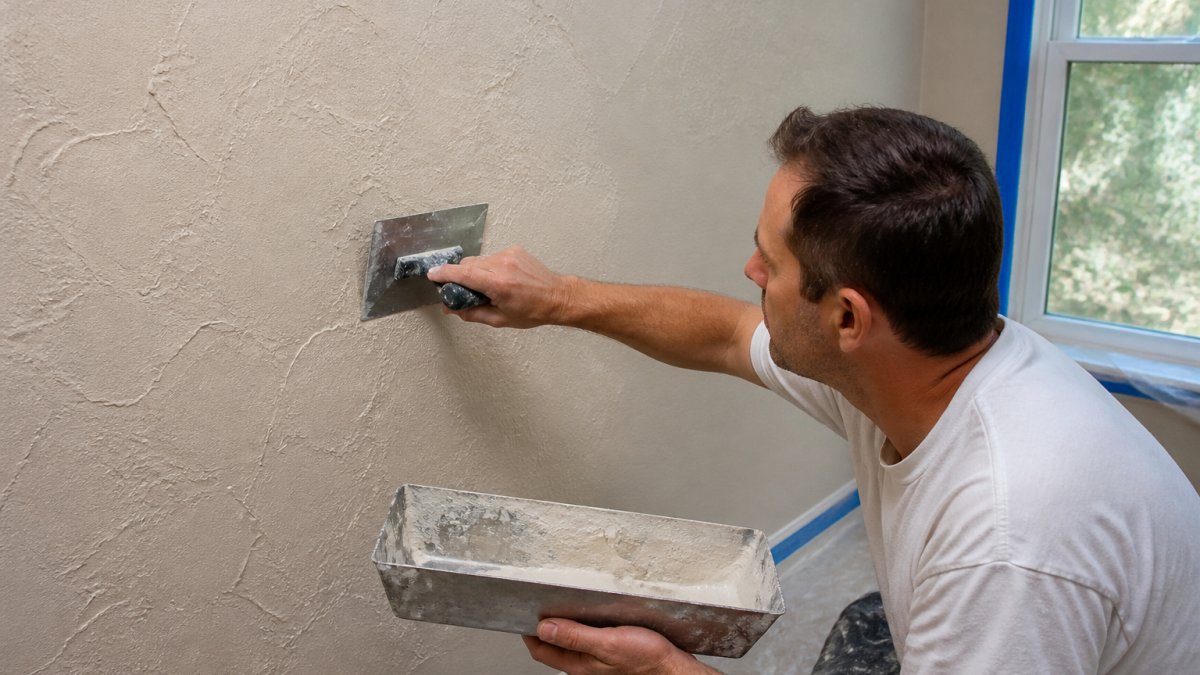
Knockdown has larger, flatter peaks than orange peel, created by spraying texture then flattening the peaks with a trowel or knife before it dries. It feels sharper and is trickier to match because the flattened peaks must align with the existing pattern; uneven flattening shows immediately.
Popcorn and Other Variants
Popcorn texture (also called acoustic or cottage cheese texture) has large, chunky bumps that feel rough and catch a fingernail. It’s less common in newer homes but frequent in older properties. Other variants include skip trowel, smooth drywall, and spray-applied fine mist finishes. Identifying the exact type matters because each requires different material and technique.
Each drywall texture type has distinct characteristics that affect how you match and apply it.
| Texture Type | Feel | Visual Pattern | Matching Difficulty |
|---|---|---|---|
| Orange Peel | Smooth to touch | Fine, uniform bumps | Forgiving; variations blend easily |
| Knockdown | Sharp, catches hand | Larger, flattened peaks | Difficult; peaks must align precisely |
| Popcorn | Rough, catches fingernail | Large, chunky bumps | Varies; less common in newer homes |
| Skip Trowel | Varies | Hand-applied marks | Varies by application method |
Essential Drywall Texture Tools and Materials
Matching texture is a tooling problem before it is a technique problem. Learn whether to hire one company or separate contractors for drywall and painting work.
Spray Equipment
- Hopper gun, the workhorse for patches larger than a few square feet. Look for an adjustable nozzle and needle/air-control valve to dial bump size without changing material; 1- to 2-gallon gravity-feed hoppers are the common homeowner size.
- Aerosol texture cans, the right call for patches under roughly 1 square foot. Pre-mixed, no cleanup, available in orange-peel, knockdown, and popcorn variants; the trade-off is cost per square foot and narrower pattern adjustment.
- Compressor, hopper guns need steady air. Follow the manual’s operating pressure rather than guessing, because pressure is the single biggest lever on bump size.
Knives, Sanding, and Prep
- 6-inch and 12-inch drywall knives, the 6-inch handles tight patches and detail; the 12-inch flattens knockdown peaks and feathers joint compound.
- Sanding pole or hand block, a pole sander keeps pressure even across a large patch. Use 120-grit for leveling cured compound and 220-grit for final smoothing before primer.
- Sanding sponge, for feathering edges and knocking down small ridges without gouging surrounding texture.
Materials and Mix Ratios
- Joint compound, all-purpose for filling and taping, topping compound for the final skim coat because it sands more easily. Buy pre-mixed unless the job is large; powder is cheaper per pound but adds mixing time.
- Texture material, pre-mixed, powder, or aerosol. Powder gives the most control over consistency; pre-mixed saves time.
- Water, for thinning, added gradually while mixing. Aim for a pancake-batter consistency: pourable but thick enough to hold a bump. Too thin and the texture sags and dries flat; too thick and it clogs the gun.
What It Costs
Aerosol texture cans typically run roughly $15 to $25 each and cover small patches. A basic hopper gun runs roughly $40 to $100, a mixing paddle is usually under $20, and a small bucket of joint compound commonly runs $15 to $25. Prices vary by retailer and region, so check current listings before you buy.
Buy one extra aerosol can in the texture type you need and use it for a test patch on scrap drywall or cardboard before you touch the wall. It is the cheapest insurance against a mismatched repair.
Safety and Dust Control
- Wear a NIOSH-rated respirator when sanding compound or spraying texture, and eye protection when working overhead.
- Tape plastic sheeting over doorways to contain dust, and use a HEPA vacuum rather than dry sweeping.
- In homes built before the 1980s, texture and joint compound may contain asbestos. Do not sand or scrape suspect texture; have a sample tested by an accredited lab and follow EPA guidance for renovation and repair in older homes.
Preparing Your Surface Before Matching Texture
Surface prep determines whether your texture sticks and blends properly.
Step 1: Remove loose material. Scrape away flaking paint, old texture, or debris around the patch with a putty knife or scraper.
Step 4: Protect the surrounding area. Tape off trim, baseboards, and adjacent walls, and lay down drop cloths.
Step 5: Test on cardboard first. Practice on cardboard to adjust spray pattern, distance, and pressure without wasting material or damaging the wall.
How to Blend a Drywall Patch Seamlessly
Blending is where amateur repairs fail. The patch looks perfect until light hits it at a low angle, then the edge becomes obvious. The fix isn’t more texture; it’s a deliberate sequence: test patch, match scale, feather wide, and inspect under raking light before you paint.
Step 1: Build a Test Patch First
Before spraying the wall, spray a scrap of drywall or cardboard and hold it next to the existing texture at the same distance and angle you’ll use on the wall. Adjust air pressure, nozzle, and distance until bump size and density match. This is the highest-leverage step in the job, and the one most homeowners skip.
Step 2: Match Texture Scale, Not Just Texture Type
Two orange-peel walls can look different because bump size and density differ. Under raking light, estimate three things:
- Bump size, fine, medium, or coarse.
- Density, how tightly the bumps are packed.
- Uniformity, whether the pattern is consistent or irregular.
Reproduce those three qualities on the test patch before moving to the wall. If the test patch reads finer than the wall, increase material thickness or reduce air pressure; if coarser, do the opposite.
Step 3: Feather Beyond the Patch
Spray the patched area and overlap onto the surrounding wall by roughly 6 to 12 inches, tapering coverage as you move outward. Work in light passes rather than one heavy coat, letting each pass set slightly before the next. The goal is a gradual transition, not a sharp boundary.
Step 4: Respect the Drying Window
Texture needs time to cure before you sand or paint. A common rule is at least 24 hours, longer in humid conditions. Don’t sand or paint while it’s soft; premature sanding clogs paper and smears the pattern.
Step 5: Inspect Under Raking Light Before Painting
Before primer, hold a light low and close to the wall and look across the surface at a shallow angle, the same lighting that will expose a bad blend after paint. If you see a hard line, density change, or bump-size mismatch, sand smooth, re-prime, and re-spray with wider feathering. It’s far easier to fix now than after two coats of paint.
Do not try to hide a mismatched blend with paint. Paint amplifies texture differences under raking light rather than concealing them. Fix the texture first.
Troubleshooting Common Blend Failures
- Visible seam after painting, feathering was too narrow or density didn’t match. Sand, re-prime, and re-spray with a wider overlap.
- Patch reads smoother than the wall, too little texture or sprayed too far away. Add light passes closer to the wall.
- Patch reads rougher than the wall, sprayed too thick or too close. Sand down and re-spray with thinner material and more distance.
The blend is judged by the eye under raking light, not by touch. Test patch, match scale, feather wide, and inspect before paint. That sequence is what separates an invisible repair from an obvious one.
[For detailed step-by-step guidance on patching and blending, learn the best way to patch drywall from start to finish.]
Applying Texture to Match Orange Peel Finishes
Orange peel is the easiest texture to match because small imperfections blend in.
Spray technique:
- Hold the spray gun 12-18 inches from the wall
- Use steady, overlapping passes
- Apply light coats rather than one heavy coat
Material consistency:
Orange peel should be thin enough to spray smoothly but thick enough to hold bumps; too thin and it won’t hold texture, too thick and it clogs the gun.
Common mistakes:
- Spraying too close (creates drips)
- Spraying too far away (texture is too fine and doesn’t match)
- Mixing too thick (clogs the applicator)
Practice on cardboard until the pattern is right; once you match the existing orange peel, the repair becomes nearly invisible.
Applying Texture to Match Knockdown Finishes
Knockdown is harder to match because the flattened peaks must be consistent and aligned.
Spray and flatten technique:
- Spray texture onto the wall in sections
- Wait 2-5 minutes for it to set slightly (not fully dry)
- Use a 12-inch drywall knife to lightly flatten the peaks
Critical timing:
Flatten too early and the wet texture slides around; wait too long and it hardens and resists flattening.
Matching the pattern:
Study the existing knockdown: the size of the flattened areas and how densely they’re packed. Replicate that spacing and size.
Common mistakes:
- Flattening too aggressively (removes all texture)
- Waiting too long before flattening (texture hardens)
- Inconsistent pressure (creates uneven pattern)
Knockdown requires more skill than orange peel.
Drying, Sanding, and Painting for a Flawless Finish
After texture is applied and dry, the final steps are sanding and painting.
Step 2: Prime again. Apply primer over the entire textured area, including feathered edges, for even paint coverage and color matching.
Step 3: Paint. Apply two coats matching the existing wall color with a roller. Paint the entire wall section, not just the patch, so there’s no color line.
[When your repair is complete, professional interior painting ensures a flawless finish. Explore interior painting services that handle both drywall texture and paint for seamless results.]
Matching drywall texture is a skill that improves with practice; the difference between an obvious repair and an invisible one comes down to technique, patience, and attention to detail. HandyFixNow handles drywall texture matching and painting as a coordinated process, eliminating the communication gaps that happen with separate contractors. Get a free estimate for texture matching and painting work, and let our team handle the details so your repairs blend perfectly.
Frequently Asked Questions
How do you match drywall texture after a repair?
First, identify your existing texture type by examining an undamaged area closely or scraping a small test area. Prepare the patched drywall with joint compound and primer. Then apply matching texture using the same spray gun or applicator as the original, working in overlapping passes. Sand lightly once dry, prime, and paint to blend seamlessly. The key is testing your spray pattern on cardboard first to match the original’s density and coverage.
How do you match orange peel drywall texture?
Orange peel texture requires a spray gun or aerosol applicator with a medium-viscosity texture compound. Thin your compound to a consistency that sprays smoothly without clogging. Practice on a test board to dial in the spray pressure and distance, typically 12 to 18 inches from the wall. Apply in light, overlapping coats rather than one heavy coat. The bumpy, dimpled finish should match the surrounding wall once dry and sanded smooth.
What tools do you need to match drywall texture?
Essential drywall texture tools include a spray gun or aerosol texture applicator, joint compound, a putty knife or taping knife, sandpaper (120-grit and 220-grit), a primer, paint, drop cloths, and safety gear (mask and goggles). For knockdown texture, you may also need a trowel or knockdown knife to flatten peaks after spraying. A moisture meter helps confirm the compound is fully dry before sanding, preventing dust and uneven results.
Can you match drywall texture with a spray can?
Yes, aerosol spray cans designed for drywall texture are effective for small repairs and patches. They offer convenience and less equipment setup than a spray gun. However, they work best on areas smaller than 20 to 30 square feet and may not deliver the exact density of larger commercial spray systems. Always test the spray pattern on cardboard first and apply multiple light coats to avoid drips and ensure even coverage that blends with your existing texture.
